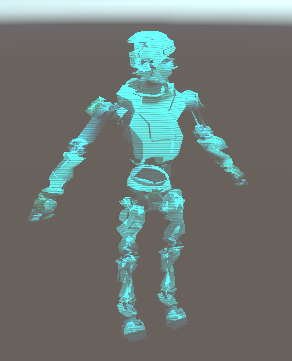
Effet d'hologramme dans l'unité
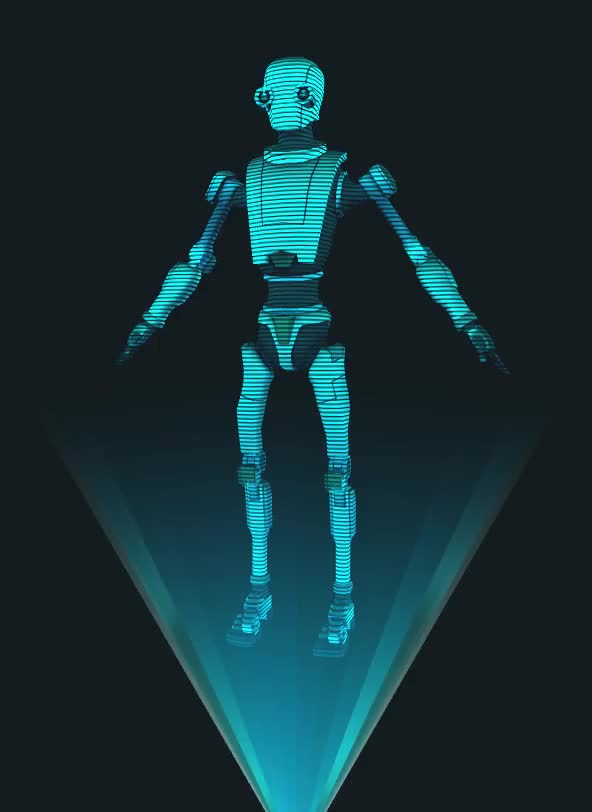
L'hologramme est une projection tridimensionnelle d'un objet ou d'une personne sur une zone proche, en utilisant une technique appelée intersection de faisceau lumineux.
Même s'il n'existe pas de véritables hologrammes, le concept a été largement popularisé par les films et les romans du genre science-fiction.
Dans ce didacticiel, je montrerai comment créer un shader d'hologramme avec un effet de pépin dans Unity.
Vérifiez ce Horizon Bending Shader
Étape 1: Créer un shader d'hologramme
L'effet d'hologramme est réalisé à l'aide d'un Shader personnalisé.
Pour créer un shader d'hologramme, suivez les étapes ci-dessous:
- Créez un nouveau Shader et nommez-le "Hologram"
- Supprimez tout ce qu'il contient puis collez le code ci-dessous:
Hologram.shader
//sharpcoderblog.com @2019
Shader "FX/Hologram Shader"
{
	Properties
	{
		_Color("Color", Color) = (0, 1, 1, 1)
		_MainTex("Base (RGB)", 2D) = "white" {}
		_AlphaTexture ("Alpha Mask (R)", 2D) = "white" {}
		//Alpha Mask Properties
		_Scale ("Alpha Tiling", Float) = 3
		_ScrollSpeedV("Alpha scroll Speed", Range(0, 5.0)) = 1.0
		// Glow
		_GlowIntensity ("Glow Intensity", Range(0.01, 1.0)) = 0.5
		// Glitch
		_GlitchSpeed ("Glitch Speed", Range(0, 50)) = 50.0
		_GlitchIntensity ("Glitch Intensity", Range(0.0, 0.1)) = 0
	}

	SubShader
	{
		Tags{ "Queue" = "Overlay" "IgnoreProjector" = "True" "RenderType" = "Transparent" }

		Pass
		{
			Lighting Off
			ZWrite On
			Blend SrcAlpha One
			Cull Back

			CGPROGRAM

				#pragma vertex vertexFunc
				#pragma fragment fragmentFunc

				#include "UnityCG.cginc"

				struct appdata{
					float4 vertex : POSITION;
					float2 uv : TEXCOORD0;
					float3 normal : NORMAL;
				};

				struct v2f{
					float4 position : SV_POSITION;
					float2 uv : TEXCOORD0;
					float3 grabPos : TEXCOORD1;
					float3 viewDir : TEXCOORD2;
					float3 worldNormal : NORMAL;
				};

				fixed4 _Color, _MainTex_ST;
				sampler2D _MainTex, _AlphaTexture;
				half _Scale, _ScrollSpeedV, _GlowIntensity, _GlitchSpeed, _GlitchIntensity;

				v2f vertexFunc(appdata IN){
					v2f OUT;

					//Glitch
					IN.vertex.z += sin(_Time.y * _GlitchSpeed * 5 * IN.vertex.y) * _GlitchIntensity;

					OUT.position = UnityObjectToClipPos(IN.vertex);
					OUT.uv = TRANSFORM_TEX(IN.uv, _MainTex);

					//Alpha mask coordinates
					OUT.grabPos = UnityObjectToViewPos(IN.vertex);

					//Scroll Alpha mask uv
					OUT.grabPos.y += _Time * _ScrollSpeedV;

					OUT.worldNormal = UnityObjectToWorldNormal(IN.normal);
					OUT.viewDir = normalize(UnityWorldSpaceViewDir(OUT.grabPos.xyz));

					return OUT;
				}

				fixed4 fragmentFunc(v2f IN) : SV_Target{

					half dirVertex = (dot(IN.grabPos, 1.0) + 1) / 2;

					fixed4 alphaColor = tex2D(_AlphaTexture,  IN.grabPos.xy * _Scale);
					fixed4 pixelColor = tex2D (_MainTex, IN.uv);
					pixelColor.w = alphaColor.w;

					// Rim Light
					half rim = 1.0-saturate(dot(IN.viewDir, IN.worldNormal));

					return pixelColor * _Color * (rim + _GlowIntensity);
				}
			ENDCG
		}
	}
}![]()
Étape 2: Attribuer le shader au matériau
À des fins de démonstration, j'utiliserai le Space Robot Kyle.
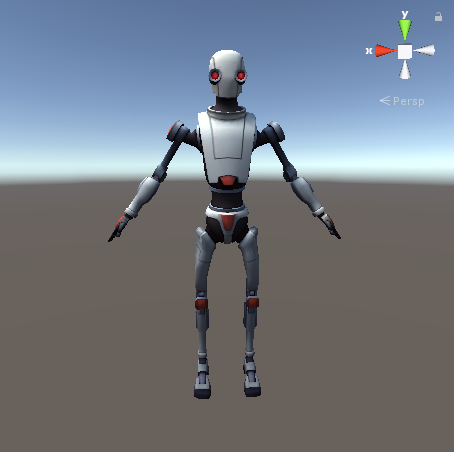
Pour attribuer un shader d'hologramme à un matériau, suivez les étapes ci-dessous:
- Créez un nouveau matériau et nommez-le "hologram_material"
- Attribuez-lui un shader nouvellement créé, qui devrait être situé à 'FX/Hologram Shader'
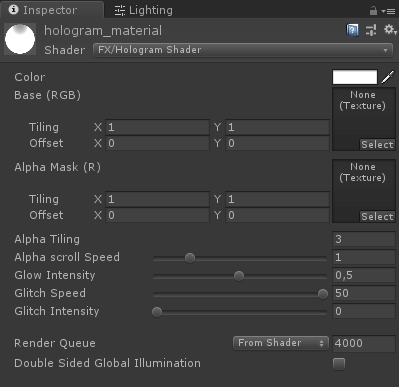
- Pour la couleur, je choisirai Cyan (0, 1, 1, 1) mais vous pouvez choisir n'importe quelle couleur
![]()
- Pour Base (RVB), attribuez une texture fournie avec le modèle

- Affectez le matériau à votre modèle 3D
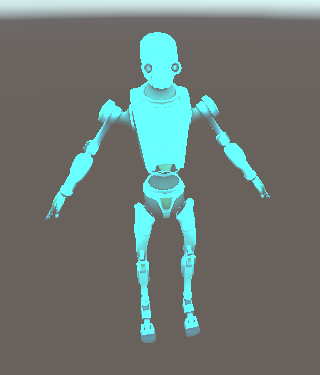
Mais comme vous le remarquerez, le modèle ne ressemble pas beaucoup à un hologramme, c'est parce que nous devons lui attribuer une dernière texture qui est Alpha Mask (R).
Dans mon cas, j'utiliserai une texture simple avec des rayures horizontales et de la transparence (pour ajouter cet effet "Holographic segmentation").
- Vérifiez la texture ci-dessous:

- Attribuez une texture ci-dessus au masque Alpha (R)

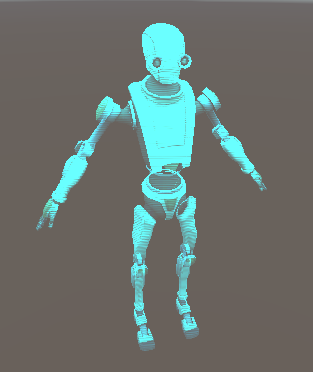
Bien mieux, maintenant le modèle ressemble plus à un hologramme !
Étape 3: Ajouter un effet Glitch
L'hologramme Shader prend également en charge un effet de pépin qui peut être contrôlé à partir d'un script.
Pour ajouter un effet glitch à un shader d'hologramme, suivez les étapes ci-dessous:
- Créez un nouveau script et nommez-le "GlitchControl"
- Copiez le code ci-dessous à l'intérieur:
GlitchControl.cs
using System.Collections;
using UnityEngine;

public class GlitchControl : MonoBehaviour
{
    //How often should the glitch effect happen (higher value means more frequently)
    public float glitchChance = 0.1f;

    Material hologramMaterial;
    WaitForSeconds glitchLoopWait = new WaitForSeconds(0.1f);

    void Awake()
    {
        hologramMaterial = GetComponent<Renderer>().material;
    }

    // Start is called before the first frame update
    IEnumerator Start()
    {
        while (true)
        {
            float glitchTest = Random.Range(0f, 1f);

            if (glitchTest <= glitchChance)
            {
                //Do Glitch
                float originalGlowIntensity = hologramMaterial.GetFloat("_GlowIntensity");
                hologramMaterial.SetFloat("_GlitchIntensity", Random.Range(0.07f, 0.1f));
                hologramMaterial.SetFloat("_GlowIntensity", originalGlowIntensity * Random.Range(0.14f, 0.44f));
                yield return new WaitForSeconds(Random.Range(0.05f, 0.1f));
                hologramMaterial.SetFloat("_GlitchIntensity", 0f);
                hologramMaterial.SetFloat("_GlowIntensity", originalGlowIntensity);
            }

            yield return glitchLoopWait;
        }
    }
}![]()
- Attachez le script GlitchControl au même GameObject que le composant Renderer avec le matériau 'hologram_material'.
- Appuyez sur Lecture et observez l'effet de pépin:
