Créez un jeu de voiture multijoueur avec PUN 2
Créer un jeu multijoueur en Unity est une tâche complexe, mais heureusement, plusieurs solutions simplifient le processus de développement.
L’une de ces solutions est le Photon Network. Plus précisément, la dernière version de leur API appelée PUN 2 s'occupe de l'hébergement du serveur et vous laisse libre de créer un jeu multijoueur comme vous le souhaitez.
Dans ce tutoriel, je vais montrer comment créer un jeu de voiture simple avec synchronisation physique à l'aide de PUN 2.
Unity version utilisée dans ce tutoriel: Unity 2018.3.0f2 (64 bits)
Partie 1: Configuration du PUN 2
La première étape consiste à télécharger un package PUN 2 à partir du Asset Store. Il contient tous les scripts et fichiers requis pour l'intégration multijoueur.
- Ouvrez votre projet Unity puis accédez au Asset Store: (Fenêtre -> Général -> AssetStore) ou appuyez sur Ctrl+9
- Recherchez "PUN 2- Free" puis cliquez sur le premier résultat ou cliquez ici
- Importez le package PUN 2 une fois le téléchargement terminé


- Une fois le package importé, vous devez créer un identifiant Photon App, cela se fait sur leur site Web: https://www.photonengine.com/
- Créez un nouveau compte (ou connectez-vous à votre compte existant)
- Accédez à la page Applications en cliquant sur l'icône de profil puis "Your Applications" ou suivez ce lien: https://dashboard.photonengine.com/en-US/PublicCloud
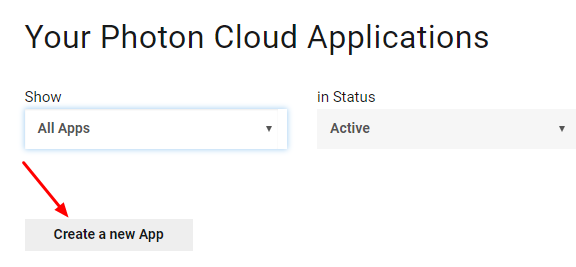
- Sur la page Applications, cliquez sur "Create new app"
- Sur la page de création, pour Type de photon sélectionnez "Photon Realtime" et pour Nom, tapez n'importe quel nom puis cliquez "Create"

Comme vous pouvez le constater, l'application utilise par défaut le forfait gratuit. Vous pouvez en savoir plus sur les plans tarifaires ici
- Une fois l'application créée, copiez l'ID de l'application situé sous le nom de l'application.

- Revenez à votre projet Unity puis allez dans Fenêtre -> Photon Unity Réseau -> Assistant PUN
- Dans l'assistant PUN, cliquez sur "Setup Project", collez votre identifiant d'application puis cliquez sur "Setup Project"

Le PUN 2 est maintenant prêt !
Partie 2: Créer un jeu de voiture multijoueur
1. Créer un lobby
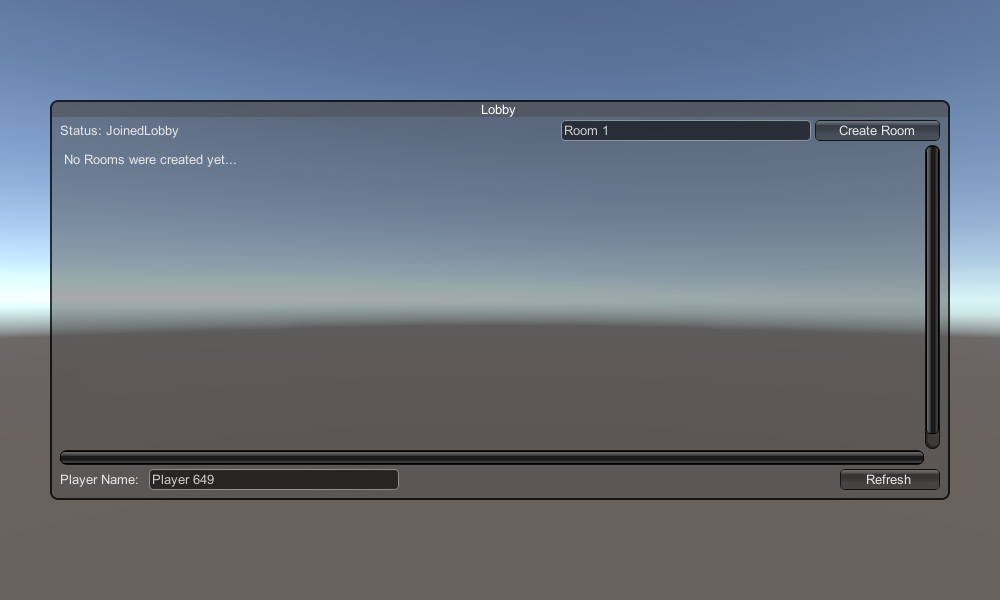
Commençons par créer une scène Lobby qui contiendra la logique du Lobby (Parcourir les salles existantes, créer de nouvelles salles, etc.):
- Créez une nouvelle scène et appelez-la "GameLobby"
- Dans la scène "GameLobby", créez un nouveau GameObject et appelez-le "_GameLobby"
- Créez un nouveau script C# et appelez-le "PUN2_GameLobby" puis attachez-le à l'objet "_GameLobby"
- Collez le code ci-dessous dans le script "PUN2_GameLobby"
PUN2_GameLobby.cs
using System.Collections.Generic;
using UnityEngine;
using Photon.Pun;
using Photon.Realtime;

public class PUN2_GameLobby : MonoBehaviourPunCallbacks
{

    //Our player name
    string playerName = "Player 1";
    //Users are separated from each other by gameversion (which allows you to make breaking changes).
    string gameVersion = "1.0";
    //The list of created rooms
    List<RoomInfo> createdRooms = new List<RoomInfo>();
    //Use this name when creating a Room
    string roomName = "Room 1";
    Vector2 roomListScroll = Vector2.zero;
    bool joiningRoom = false;

    // Use this for initialization
    void Start()
    {
        //Initialize Player name
        playerName = "Player " + Random.Range(111, 999);

        //This makes sure we can use PhotonNetwork.LoadLevel() on the master client and all clients in the same room sync their level automatically
        PhotonNetwork.AutomaticallySyncScene = true;

        if (!PhotonNetwork.IsConnected)
        {
            //Set the App version before connecting
            PhotonNetwork.PhotonServerSettings.AppSettings.AppVersion = gameVersion;
            PhotonNetwork.PhotonServerSettings.AppSettings.FixedRegion = "eu";
            // Connect to the photon master-server. We use the settings saved in PhotonServerSettings (a .asset file in this project)
            PhotonNetwork.ConnectUsingSettings();
        }
    }

    public override void OnDisconnected(DisconnectCause cause)
    {
        Debug.Log("OnFailedToConnectToPhoton. StatusCode: " + cause.ToString() + " ServerAddress: " + PhotonNetwork.ServerAddress);
    }

    public override void OnConnectedToMaster()
    {
        Debug.Log("OnConnectedToMaster");
        //After we connected to Master server, join the Lobby
        PhotonNetwork.JoinLobby(TypedLobby.Default);
    }

    public override void OnRoomListUpdate(List<RoomInfo> roomList)
    {
        Debug.Log("We have received the Room list");
        //After this callback, update the room list
        createdRooms = roomList;
    }

    void OnGUI()
    {
        GUI.Window(0, new Rect(Screen.width / 2 - 450, Screen.height / 2 - 200, 900, 400), LobbyWindow, "Lobby");
    }

    void LobbyWindow(int index)
    {
        //Connection Status and Room creation Button
        GUILayout.BeginHorizontal();

        GUILayout.Label("Status: " + PhotonNetwork.NetworkClientState);

        if (joiningRoom || !PhotonNetwork.IsConnected || PhotonNetwork.NetworkClientState != ClientState.JoinedLobby)
        {
            GUI.enabled = false;
        }

        GUILayout.FlexibleSpace();

        //Room name text field
        roomName = GUILayout.TextField(roomName, GUILayout.Width(250));

        if (GUILayout.Button("Create Room", GUILayout.Width(125)))
        {
            if (roomName != "")
            {
                joiningRoom = true;

                RoomOptions roomOptions = new RoomOptions();
                roomOptions.IsOpen = true;
                roomOptions.IsVisible = true;
                roomOptions.MaxPlayers = (byte)10; //Set any number

                PhotonNetwork.JoinOrCreateRoom(roomName, roomOptions, TypedLobby.Default);
            }
        }

        GUILayout.EndHorizontal();

        //Scroll through available rooms
        roomListScroll = GUILayout.BeginScrollView(roomListScroll, true, true);

        if (createdRooms.Count == 0)
        {
            GUILayout.Label("No Rooms were created yet...");
        }
        else
        {
            for (int i = 0; i < createdRooms.Count; i++)
            {
                GUILayout.BeginHorizontal("box");
                GUILayout.Label(createdRooms[i].Name, GUILayout.Width(400));
                GUILayout.Label(createdRooms[i].PlayerCount + "/" + createdRooms[i].MaxPlayers);

                GUILayout.FlexibleSpace();

                if (GUILayout.Button("Join Room"))
                {
                    joiningRoom = true;

                    //Set our Player name
                    PhotonNetwork.NickName = playerName;

                    //Join the Room
                    PhotonNetwork.JoinRoom(createdRooms[i].Name);
                }
                GUILayout.EndHorizontal();
            }
        }

        GUILayout.EndScrollView();

        //Set player name and Refresh Room button
        GUILayout.BeginHorizontal();

        GUILayout.Label("Player Name: ", GUILayout.Width(85));
        //Player name text field
        playerName = GUILayout.TextField(playerName, GUILayout.Width(250));

        GUILayout.FlexibleSpace();

        GUI.enabled = (PhotonNetwork.NetworkClientState == ClientState.JoinedLobby || PhotonNetwork.NetworkClientState == ClientState.Disconnected) && !joiningRoom;
        if (GUILayout.Button("Refresh", GUILayout.Width(100)))
        {
            if (PhotonNetwork.IsConnected)
            {
                //Re-join Lobby to get the latest Room list
                PhotonNetwork.JoinLobby(TypedLobby.Default);
            }
            else
            {
                //We are not connected, estabilish a new connection
                PhotonNetwork.ConnectUsingSettings();
            }
        }

        GUILayout.EndHorizontal();

        if (joiningRoom)
        {
            GUI.enabled = true;
            GUI.Label(new Rect(900 / 2 - 50, 400 / 2 - 10, 100, 20), "Connecting...");
        }
    }

    public override void OnCreateRoomFailed(short returnCode, string message)
    {
        Debug.Log("OnCreateRoomFailed got called. This can happen if the room exists (even if not visible). Try another room name.");
        joiningRoom = false;
    }

    public override void OnJoinRoomFailed(short returnCode, string message)
    {
        Debug.Log("OnJoinRoomFailed got called. This can happen if the room is not existing or full or closed.");
        joiningRoom = false;
    }

    public override void OnJoinRandomFailed(short returnCode, string message)
    {
        Debug.Log("OnJoinRandomFailed got called. This can happen if the room is not existing or full or closed.");
        joiningRoom = false;
    }

    public override void OnCreatedRoom()
    {
        Debug.Log("OnCreatedRoom");
        //Set our player name
        PhotonNetwork.NickName = playerName;
        //Load the Scene called Playground (Make sure it's added to build settings)
        PhotonNetwork.LoadLevel("Playground");
    }

    public override void OnJoinedRoom()
    {
        Debug.Log("OnJoinedRoom");
    }
}
2. Créer un préfabriqué de voiture
Le préfabriqué Car utilisera un simple contrôleur physique.
- Créez un nouveau GameObject et appelez-le "CarRoot"
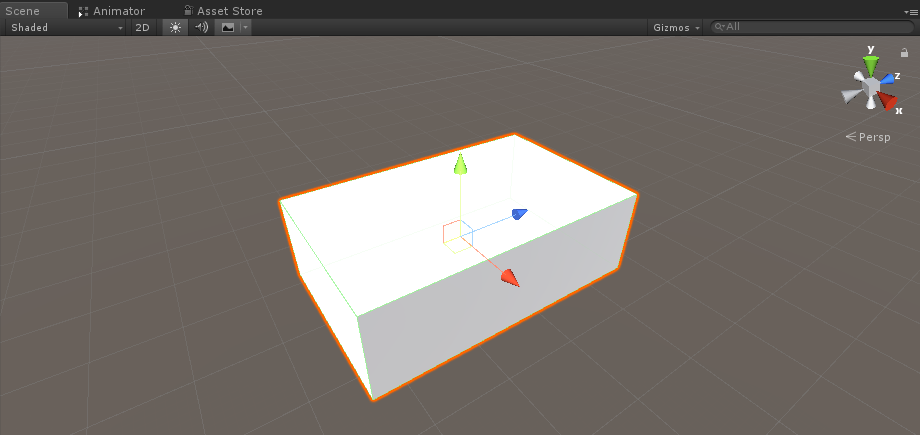
- Créez un nouveau cube et déplacez-le à l'intérieur de l'objet "CarRoot", puis agrandissez-le le long des axes Z et X.
- Créez un nouveau GameObject et nommez-le "wfl" (abréviation de Wheel Front Left)
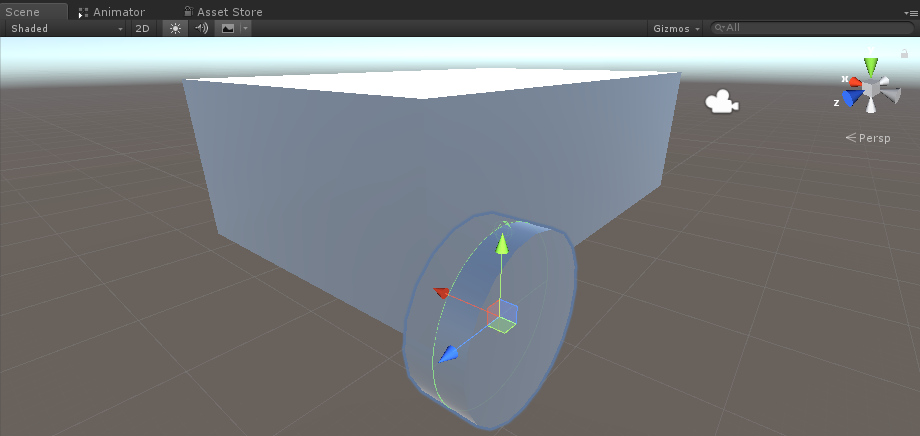
- Ajoutez le composant Wheel Collider à l'objet "wfl" et définissez les valeurs à partir de l'image ci-dessous:

- Créez un nouveau GameObject, renommez-le "WheelTransform" puis déplacez-le à l'intérieur de l'objet "wfl"
- Créez un nouveau cylindre, déplacez-le à l'intérieur de l'objet "WheelTransform", puis faites-le pivoter et réduisez-le jusqu'à ce qu'il corresponde aux dimensions du Wheel Collider. Dans mon cas, l'échelle est (1, 0,17, 1)
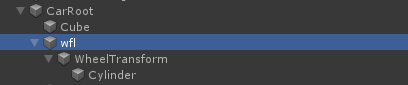
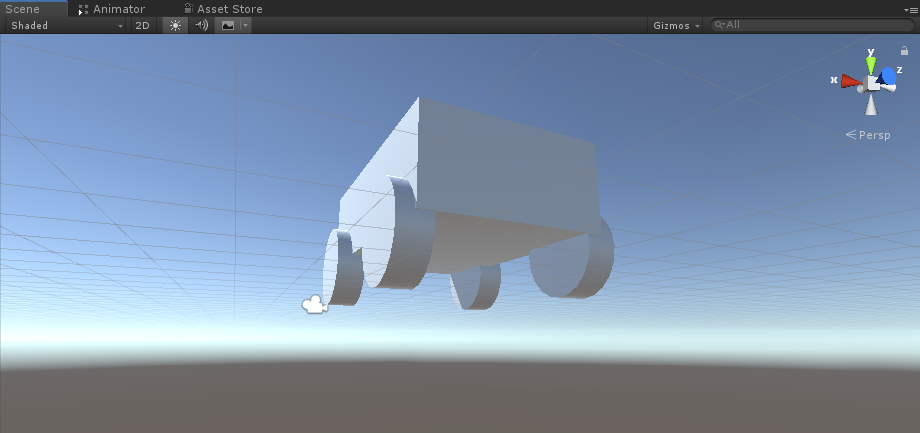
- Enfin, dupliquez l'objet "wfl" 3 fois pour le reste des roues et renommez chaque objet en "wfr" (Roue avant droite), "wrr" (Roue arrière droite) et "wrl" (Roue arrière gauche) respectivement.
- Créez un nouveau script, appelez-le "SC_CarController" puis collez-y le code ci-dessous:
SC_CarController.cs
using UnityEngine;
using System.Collections;

public class SC_CarController : MonoBehaviour
{
    public WheelCollider WheelFL;
    public WheelCollider WheelFR;
    public WheelCollider WheelRL;
    public WheelCollider WheelRR;
    public Transform WheelFLTrans;
    public Transform WheelFRTrans;
    public Transform WheelRLTrans;
    public Transform WheelRRTrans;
    public float steeringAngle = 45;
    public float maxTorque = 1000;
    public  float maxBrakeTorque = 500;
    public Transform centerOfMass;

    float gravity = 9.8f;
    bool braked = false;
    Rigidbody rb;

    void Start()
    {
        rb = GetComponent<Rigidbody>();
        rb.centerOfMass = centerOfMass.transform.localPosition;
    }

    void FixedUpdate()
    {
        if (!braked)
        {
            WheelFL.brakeTorque = 0;
            WheelFR.brakeTorque = 0;
            WheelRL.brakeTorque = 0;
            WheelRR.brakeTorque = 0;
        }
        //Speed of car, Car will move as you will provide the input to it.

        WheelRR.motorTorque = maxTorque * Input.GetAxis("Vertical");
        WheelRL.motorTorque = maxTorque * Input.GetAxis("Vertical");

        //Changing car direction
        //Here we are changing the steer angle of the front tyres of the car so that we can change the car direction.
        WheelFL.steerAngle = steeringAngle * Input.GetAxis("Horizontal");
        WheelFR.steerAngle = steeringAngle * Input.GetAxis("Horizontal");
    }
    void Update()
    {
        HandBrake();

        //For tyre rotate
        WheelFLTrans.Rotate(WheelFL.rpm / 60 * 360 * Time.deltaTime, 0, 0);
        WheelFRTrans.Rotate(WheelFR.rpm / 60 * 360 * Time.deltaTime, 0, 0);
        WheelRLTrans.Rotate(WheelRL.rpm / 60 * 360 * Time.deltaTime, 0, 0);
        WheelRRTrans.Rotate(WheelRL.rpm / 60 * 360 * Time.deltaTime, 0, 0);
        //Changing tyre direction
        Vector3 temp = WheelFLTrans.localEulerAngles;
        Vector3 temp1 = WheelFRTrans.localEulerAngles;
        temp.y = WheelFL.steerAngle - (WheelFLTrans.localEulerAngles.z);
        WheelFLTrans.localEulerAngles = temp;
        temp1.y = WheelFR.steerAngle - WheelFRTrans.localEulerAngles.z;
        WheelFRTrans.localEulerAngles = temp1;
    }
    void HandBrake()
    {
        //Debug.Log("brakes " + braked);
        if (Input.GetButton("Jump"))
        {
            braked = true;
        }
        else
        {
            braked = false;
        }
        if (braked)
        {

            WheelRL.brakeTorque = maxBrakeTorque * 20;//0000;
            WheelRR.brakeTorque = maxBrakeTorque * 20;//0000;
            WheelRL.motorTorque = 0;
            WheelRR.motorTorque = 0;
        }
    }
}- Attachez le script SC_CarController à l'objet "CarRoot"
- Attachez le composant Rigidbody à l'objet "CarRoot" et modifiez sa masse à 1000
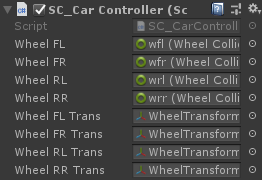
- Attribuez les variables de roue dans SC_CarController (Wheel Collider pour les 4 premières variables et WheelTransform pour le reste des 4)
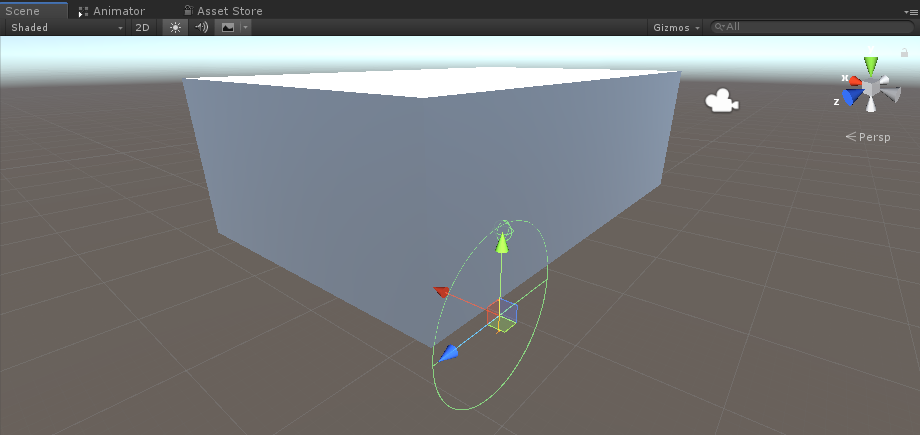
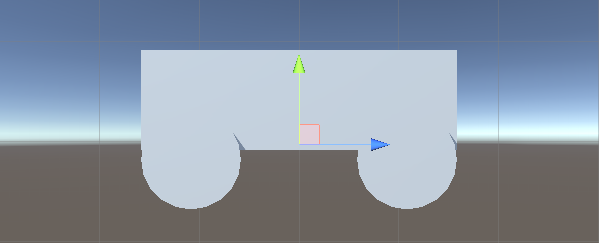
- Pour la variable Centre de masse, créez un nouveau GameObject, appelez-le "CenterOfMass" et déplacez-le à l'intérieur de l'objet "CarRoot"
- Placez l'objet "CenterOfMass" au milieu et légèrement vers le bas, comme ceci:
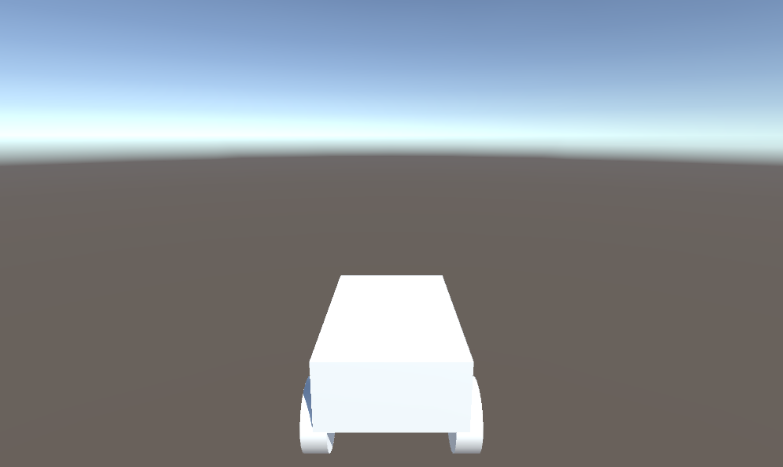
- Enfin, à des fins de test, déplacez la caméra principale à l'intérieur de l'objet "CarRoot" et pointez-la vers la voiture:
- Créez un nouveau script, appelez-le "PUN2_CarSync" puis collez-y le code ci-dessous:
PUN2_CarSync.cs
using System.Collections;
using System.Collections.Generic;
using UnityEngine;
using Photon.Pun;

public class PUN2_CarSync : MonoBehaviourPun, IPunObservable
{
    public MonoBehaviour[] localScripts; //Scripts that should only be enabled for the local player (Ex. Car controller)
    public GameObject[] localObjects; //Objects that should only be active for the local player (Ex. Camera)
    public Transform[] wheels; //Car wheel transforms

    Rigidbody r;
    // Values that will be synced over network
    Vector3 latestPos;
    Quaternion latestRot;
    Vector3 latestVelocity;
    Vector3 latestAngularVelocity;
    Quaternion[] wheelRotations = new Quaternion[0];
    // Lag compensation
    float currentTime = 0;
    double currentPacketTime = 0;
    double lastPacketTime = 0;
    Vector3 positionAtLastPacket = Vector3.zero;
    Quaternion rotationAtLastPacket = Quaternion.identity;
    Vector3 velocityAtLastPacket = Vector3.zero;
    Vector3 angularVelocityAtLastPacket = Vector3.zero;

    // Use this for initialization
    void Awake()
    {
        r = GetComponent<Rigidbody>();
        r.isKinematic = !photonView.IsMine;
        for (int i = 0; i < localScripts.Length; i++)
        {
            localScripts[i].enabled = photonView.IsMine;
        }
        for (int i = 0; i < localObjects.Length; i++)
        {
            localObjects[i].SetActive(photonView.IsMine);
        }
    }

    public void OnPhotonSerializeView(PhotonStream stream, PhotonMessageInfo info)
    {
        if (stream.IsWriting)
        {
            // We own this player: send the others our data
            stream.SendNext(transform.position);
            stream.SendNext(transform.rotation);
            stream.SendNext(r.velocity);
            stream.SendNext(r.angularVelocity);

            wheelRotations = new Quaternion[wheels.Length];
            for(int i = 0; i < wheels.Length; i++)
            {
                wheelRotations[i] = wheels[i].localRotation;
            }
            stream.SendNext(wheelRotations);
        }
        else
        {
            // Network player, receive data
            latestPos = (Vector3)stream.ReceiveNext();
            latestRot = (Quaternion)stream.ReceiveNext();
            latestVelocity = (Vector3)stream.ReceiveNext();
            latestAngularVelocity = (Vector3)stream.ReceiveNext();
            wheelRotations = (Quaternion[])stream.ReceiveNext();

            // Lag compensation
            currentTime = 0.0f;
            lastPacketTime = currentPacketTime;
            currentPacketTime = info.SentServerTime;
            positionAtLastPacket = transform.position;
            rotationAtLastPacket = transform.rotation;
            velocityAtLastPacket = r.velocity;
            angularVelocityAtLastPacket = r.angularVelocity;
        }
    }

    // Update is called once per frame
    void Update()
    {
        if (!photonView.IsMine)
        {
            // Lag compensation
            double timeToReachGoal = currentPacketTime - lastPacketTime;
            currentTime += Time.deltaTime;

            // Update car position and velocity
            transform.position = Vector3.Lerp(positionAtLastPacket, latestPos, (float)(currentTime / timeToReachGoal));
            transform.rotation = Quaternion.Lerp(rotationAtLastPacket, latestRot, (float)(currentTime / timeToReachGoal));
            r.velocity = Vector3.Lerp(velocityAtLastPacket, latestVelocity, (float)(currentTime / timeToReachGoal));
            r.angularVelocity = Vector3.Lerp(angularVelocityAtLastPacket, latestAngularVelocity, (float)(currentTime / timeToReachGoal));

            //Apply wheel rotation
            if(wheelRotations.Length == wheels.Length)
            {
                for (int i = 0; i < wheelRotations.Length; i++)
                {
                    wheels[i].localRotation = Quaternion.Lerp(wheels[i].localRotation, wheelRotations[i], Time.deltaTime * 6.5f);
                }
            }
        }
    }
}- Attachez le script PUN2_CarSync à l'objet "CarRoot"
- Attacher le composant PhotonView à l'objet "CarRoot"
- Dans PUN2_CarSync, attribuez le script SC_CarController au tableau Local Scripts
- Dans PUN2_CarSync, attribuez la caméra au tableau d'objets locaux
- Attribuer des objets WheelTransform au tableau Wheels
- Enfin, attribuez le script PUN2_CarSync au tableau des composants observés dans Photon View.
- Enregistrez l'objet "CarRoot" dans Prefab et placez-le dans un dossier appelé Ressources (cela est nécessaire pour pouvoir générer des objets sur le réseau)
3. Créer un niveau de jeu
Le niveau de jeu est une scène qui est chargée après avoir rejoint la salle, où toute l'action se déroule.
- Créez une nouvelle scène et appelez-la "Playground" (Ou si vous souhaitez conserver un nom différent, assurez-vous de changer le nom dans cette ligne PhotonNetwork.LoadLevel("Playground"); dans PUN2_GameLobby.cs).
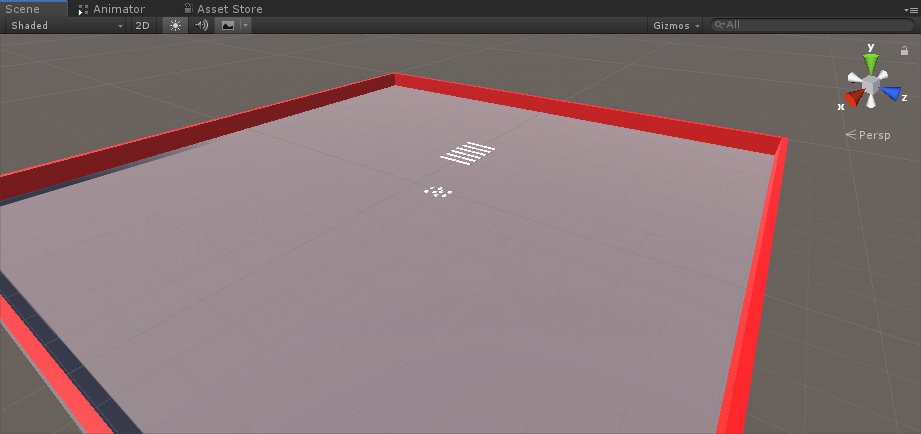
Dans mon cas, j'utiliserai une scène simple avec un avion et quelques cubes:
- Créez un nouveau script et appelez-le PUN2_RoomController (ce script gérera la logique à l'intérieur de la salle, comme la génération des joueurs, l'affichage de la liste des joueurs, etc.), puis collez le code ci-dessous à l'intérieur:
PUN2_RoomController.cs
using UnityEngine;
using Photon.Pun;

public class PUN2_RoomController : MonoBehaviourPunCallbacks
{

    //Player instance prefab, must be located in the Resources folder
    public GameObject playerPrefab;
    //Player spawn point
    public Transform[] spawnPoints;

    // Use this for initialization
    void Start()
    {
        //In case we started this demo with the wrong scene being active, simply load the menu scene
        if (PhotonNetwork.CurrentRoom == null)
        {
            Debug.Log("Is not in the room, returning back to Lobby");
            UnityEngine.SceneManagement.SceneManager.LoadScene("GameLobby");
            return;
        }

        //We're in a room. spawn a character for the local player. it gets synced by using PhotonNetwork.Instantiate
        PhotonNetwork.Instantiate(playerPrefab.name, spawnPoints[Random.Range(0, spawnPoints.Length - 1)].position, spawnPoints[Random.Range(0, spawnPoints.Length - 1)].rotation, 0);
    }

    void OnGUI()
    {
        if (PhotonNetwork.CurrentRoom == null)
            return;

        //Leave this Room
        if (GUI.Button(new Rect(5, 5, 125, 25), "Leave Room"))
        {
            PhotonNetwork.LeaveRoom();
        }

        //Show the Room name
        GUI.Label(new Rect(135, 5, 200, 25), PhotonNetwork.CurrentRoom.Name);

        //Show the list of the players connected to this Room
        for (int i = 0; i < PhotonNetwork.PlayerList.Length; i++)
        {
            //Show if this player is a Master Client. There can only be one Master Client per Room so use this to define the authoritative logic etc.)
            string isMasterClient = (PhotonNetwork.PlayerList[i].IsMasterClient ? ": MasterClient" : "");
            GUI.Label(new Rect(5, 35 + 30 * i, 200, 25), PhotonNetwork.PlayerList[i].NickName + isMasterClient);
        }
    }

    public override void OnLeftRoom()
    {
        //We have left the Room, return back to the GameLobby
        UnityEngine.SceneManagement.SceneManager.LoadScene("GameLobby");
    }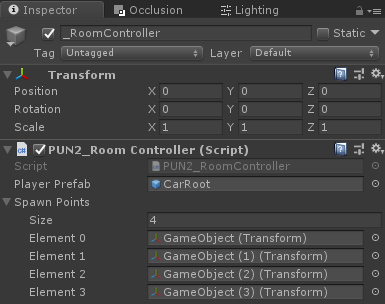
}- Créez un nouveau GameObject dans la scène "Playground" et appelez-le "_RoomController"
- Attachez un script PUN2_RoomController à l'objet _RoomController
- Attribuez un préfabriqué de voiture et un SpawnPoints puis enregistrez la scène
- Ajoutez les scènes GameLobby et Playground aux paramètres de construction:

4. Faire une version de test
Il est maintenant temps de créer un build et de le tester:
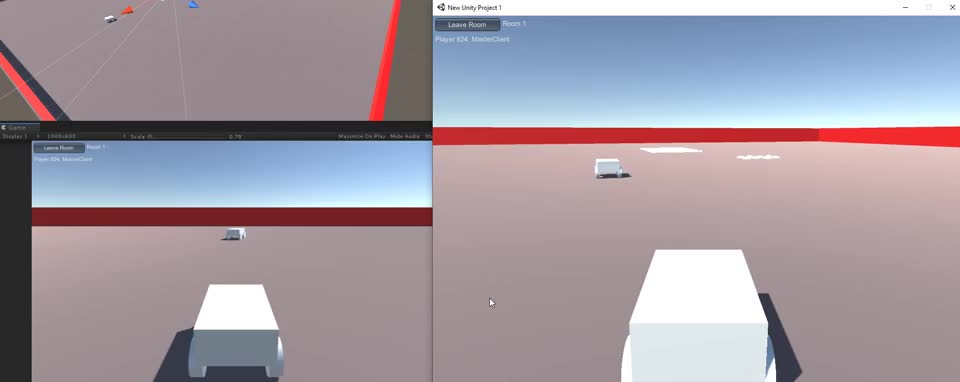
Tout fonctionne comme prévu !